
Objective:
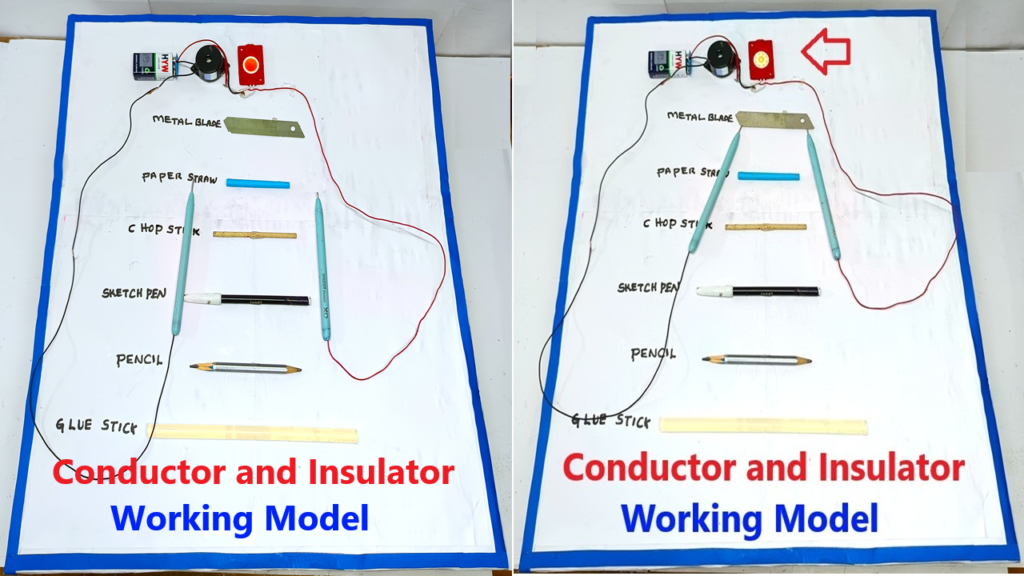
To demonstrate the difference between conductors and insulators by creating a working circuit that uses an LED light, a buzzer, GI (Galvanized Iron) metal wire as a probe, and a 9V battery. The model will show how conductors allow electricity to flow, while insulators do not.
Materials Required:
- LED light (to visually indicate current flow)
- Buzzer (to make sound when electricity flows)
- GI metal wire (to act as a probe and conduct electricity)
- Insulating materials (like rubber, plastic, or wood to demonstrate insulators)
- 9V battery (for power supply)
- Battery holder (to hold the 9V battery securely)
- Switch (to control the flow of electricity)
- Cardboard or wooden board (for the base)
- Connecting wires (to build the circuit)
- Tape and glue (for assembly)
- Conductive materials (like copper wire, aluminum foil, etc., to demonstrate conductors)
Steps to Build the Conductor and Insulator Working Model :
- Prepare the Base:
- Cut a piece of cardboard or wood to create a stable base for your working model.
- Arrange the LED light and buzzer in places where they will be easily visible and audible.
- Set Up the Circuit:
- LED and Buzzer: Connect the LED light and buzzer in series to the power source (the 9V battery) and switch.
- Battery Holder: Secure the 9V battery in the battery holder and connect the positive and negative terminals to the LED-buzzer circuit.
- Switch: Connect a switch to the circuit to allow you to turn the electricity on and off.
- Adding Conductors:
- Use GI metal wire as a conductor. Place it on the base as a probe that can complete the circuit when touching the appropriate materials.
- You can also add copper wire, aluminum foil, or other conductive materials to show how electricity flows when a conductor is present.
- Adding Insulators:
- Place insulating materials (rubber, plastic, or wood) in the path of the circuit. These materials will block the flow of electricity and prevent the LED or buzzer from activating.
- Set up areas where you can touch or place the GI metal wire probe to conductive or insulating materials, demonstrating the effect on the circuit.
- Demonstrating Conductors and Insulators:
- With the switch off, place the GI metal wire probe on a conductive material (like copper wire or aluminum foil). Turn the switch on, and the LED light should glow, and the buzzer should sound, indicating that electricity is flowing.
- Now, place the probe on an insulating material (like rubber, plastic, or wood). When you turn the switch on, the LED will not light, and the buzzer will not sound, indicating that the flow of electricity is blocked.
- Labeling the Model:
- Label the different parts of the circuit: LED, Buzzer, Battery, Switch, and Conductive and Insulating Materials.
- You can also include definitions of conductors and insulators on a separate part of the cardboard.
How It Works:
- Conductors: Materials like GI metal wire, copper, and aluminum allow electricity to flow through them, completing the circuit. When the probe touches these materials, the circuit is closed, and electricity flows, lighting up the LED and activating the buzzer.
- Insulators: Materials like rubber, plastic, and wood block the flow of electricity, preventing the circuit from being completed. When the probe touches these materials, the LED and buzzer will not activate, demonstrating that insulators do not allow current to flow.
Demonstration:
- Turn the switch on and place the probe on the conductor to show how the LED light glows and the buzzer sounds. This demonstrates that the material is conducting electricity.
- Switch to an insulating material, and show how the LED and buzzer stop working, indicating that the electricity cannot pass through the insulator.