Creating a working model on sets (intersections and union) using syringes and cardboard is a great way to visualize these mathematical concepts.

Here’s a step-by-step guide to help you create this model:
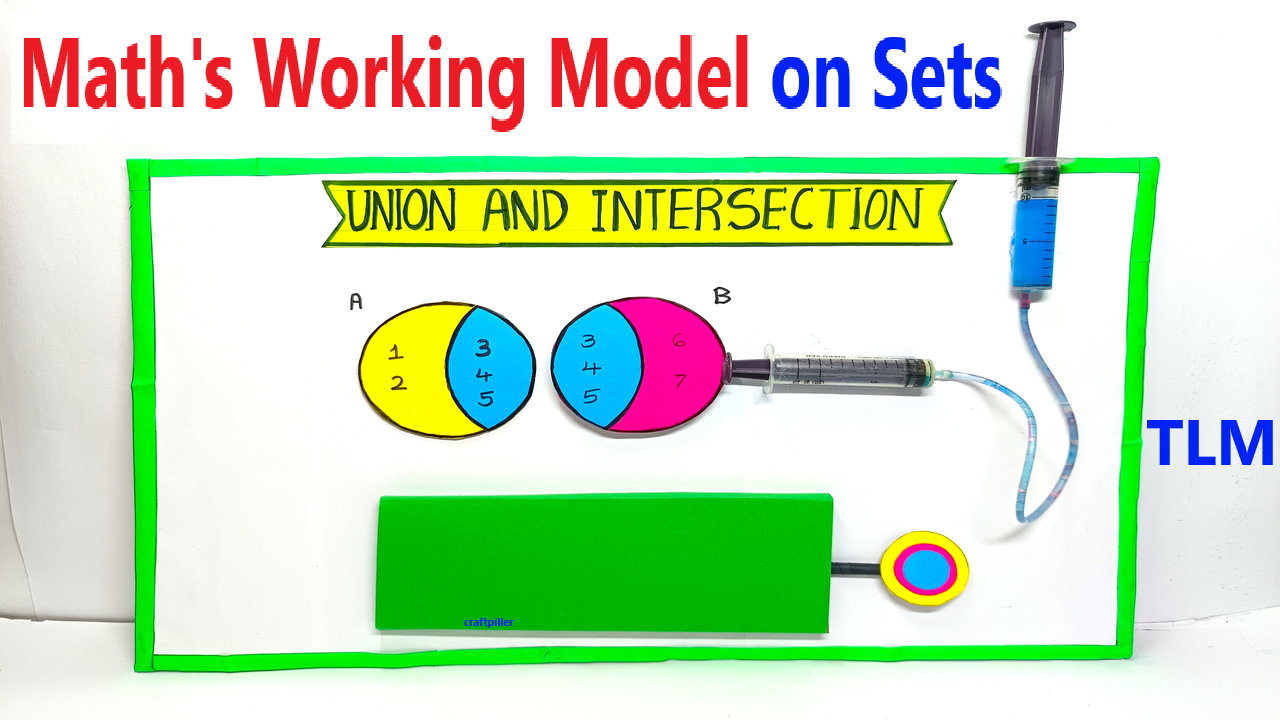
Materials Needed:
- Cardboard (for the base and circles)
- Syringes (preferably 3, without needles)
- Rubber bands (to connect the syringes)
- Small balloons or flexible plastic sheets (to represent the sets)
- Glue or tape
- Markers/Colors (to label the sets)
- Scissors
- Paper clips or small nails (optional, for pivot points)
Video Steps for Creating the Model:
1. Prepare the Base
- Cut a large rectangle out of cardboard. This will serve as the base of your model.
- Use markers to divide the base into different regions, labeling them as A, B, and A∩B (intersection), etc.
2. Create the Sets Using Balloons or Plastic Sheets
- Cut two circular or oval shapes from small balloons or plastic sheets. These will represent sets A and B.
- Fix them to the base in such a way that they partially overlap, showing the intersection region. You can glue or tape the edges of the balloons or plastic onto the base.
3. Attach Syringes for Interactive Movement
- Take three syringes, and remove the plungers from two of them. Leave one syringe as it is.
- Attach the rubber bands to the nozzles of the two empty syringes, and tie the other end of each rubber band to the nozzle of the third syringe (the one with the plunger intact). This will allow you to create tension and control movement.
4. Connect the Syringes to the Sets
- Tape or glue the syringes to the circles representing sets A and B.
- Use the plunger syringe to move both circles. When you press the plunger, it should pull the rubber bands, causing the sets to move closer, showing the intersection. When you release it, the sets can return to their union state.
5. Label the Model
- Use markers or colored paper to clearly label Set A, Set B, A∪B (union), and A∩B (intersection).
- You can add arrows to show how the sets move when you press or release the plunger of the syringe.
6. Demonstrate the Concepts
- Intersection: Push the plunger to bring the two sets closer, making the intersection visible (where both sets overlap).
- Union: Release the plunger to show the union, where both sets are fully visible.