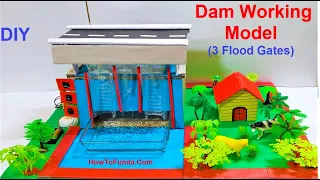
Creating a 3D working model of a dam using three DC water pumps to demonstrate how water is pumped into three separate sections of the dam is an engaging and educational project.

Here’s a step-by-step guide to help you build this model using a biscuit plastic cover for the output bridge, a plastic tray to capture the water outflow, and a 9V battery with three switches for each pump.
Materials Needed:
- Three DC water pumps
- Three switches
- 9V battery and battery holder
- Wires
- Biscuit plastic cover (for the output bridge)
- Plastic tray (to capture and store backwater)
- Cardboard or foam board (to construct the dam structure)
- Glue or tape
- Scissors or a craft knife
- Tubing (to connect the pumps to the dam and output bridge)
- Small container or plastic bottle (to hold the water for the pumps)
- Decorative materials (optional: paint, markers, etc.)
Step by Step Video Instructions:
1. Construct the Dam Structure:
- Use cardboard or foam board to build a dam with three separate sections. Ensure each section has an inlet where water can be pumped in and an outlet where water can flow out.
- Glue or tape the sections together to form the dam.
2. Prepare the Output Bridge:
- Cut the biscuit plastic cover to create channels that will guide the water flowing out from each section of the dam.
- Attach these channels to the outlets of each section of the dam.
3. Set Up the Plastic Tray:
- Place the plastic tray below the dam to capture the water flowing out of the dam. This tray will also serve as the reservoir for the backwater that the pumps will recycle.
4. Install the Water Pumps:
- Place the three DC water pumps in the plastic tray. These pumps will be used to move water from the tray back into the dam.
- Connect a piece of tubing to each pump’s outlet. The other end of each tube should be connected to the inlets of the three sections of the dam.
5. Wire the Electrical Components:
- Connect each DC water pump to a switch. This will allow you to control the flow of water into each section of the dam independently.
- Connect the switches to the 9V battery using wires. Make sure each pump has its own circuit with a switch and is connected to the battery.
6. Set Up the Water Supply:
- Fill the plastic tray with water. This will be the initial water source for the pumps.
7. Test the System:
- Turn on each switch one at a time to test if the pumps are working correctly. The water should be pumped from the tray into the respective sections of the dam, flow through the dam, and come out via the biscuit cover channels into the tray again.
Dam Working Model Explanation:
This model shows how a dam manages water flow using multiple sections and pumps. In real dams, various techniques are used to control water levels, generate electricity, and manage water resources.
Our model consists of three separate sections, each with an inlet and an outlet. We use three DC water pumps to move water from the reservoir (our plastic tray) into each section of the dam. The water then flows out of the dam through channels made from a biscuit plastic cover, simulating how a real dam releases water.
Each pump is connected to a switch, allowing us to control water flow into each section independently. This demonstrates how dams can regulate water distribution, such as releasing more water during high demand periods or retaining water during low supply periods.
By observing this model, we can understand the basic principles of how dams work, including water storage, controlled release, and recycling. This setup also illustrates the importance of efficient water management in real-world applications, such as preventing floods and ensuring a steady water supply.