Creating a 3D shapes working model that demonstrates total surface area (TSA), curved surface area (CSA), and volume formulas using colored paper and cardboard is an excellent educational project.
Here’s a step-by-step guide:
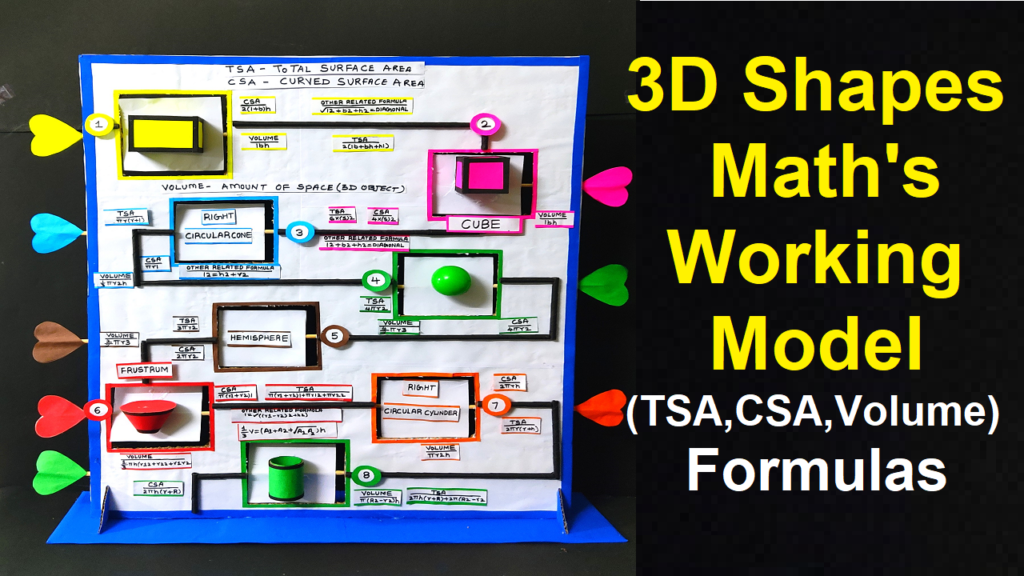
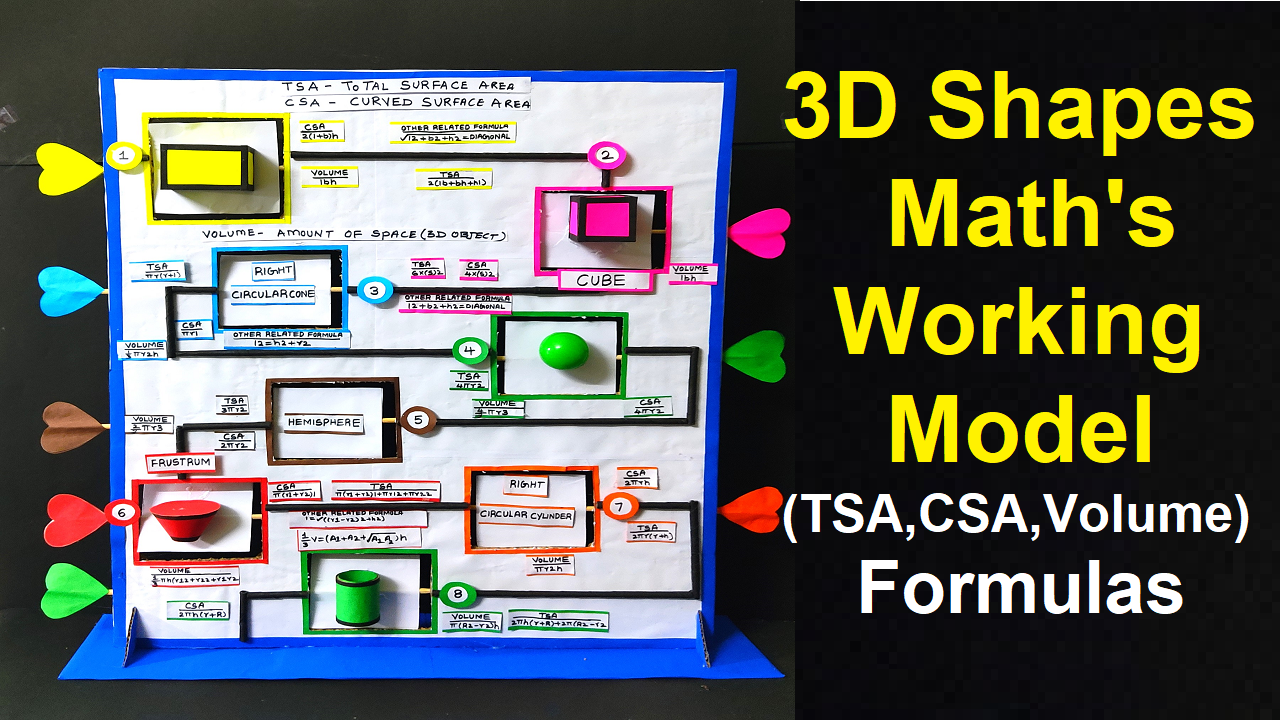
Title: “Exploring 3D Shapes: TSA, CSA, and Volume”
Materials Needed:
- Cardboard (for the base and shapes)
- Colored paper (for decoration and shapes)
- Pencil and ruler
- Craft glue or hot glue gun
- Scissors
- Markers or pens
- Labels and descriptions
- String or thread (optional, for demonstrating CSA)
Step-by-Step Instructions:
- Plan Your Model:
- Decide which 3D shapes you want to include (e.g., cube, cylinder, cone, etc.). Each shape will demonstrate TSA, CSA, and volume.
- Prepare the Base:
- Cut out a large, sturdy base from cardboard. This will be the foundation for your model.
- Create 3D Shapes:
- Use colored paper to create 3D shapes. For example, fold and glue paper to create a cube, cylinder, and cone.
- Label Shapes:
- Label each shape with its name (e.g., “Cube,” “Cylinder,” etc.).
- Calculate and Display Formulas:
- Write down the formulas for TSA, CSA, and volume for each shape. Attach these to the respective shapes using labels or small pieces of colored paper.
- Demonstrate TSA:
- Use colored paper to cover the entire surface of each shape. This will represent the total surface area. Make sure to cut and fold the paper to fit the shape accurately.
- Demonstrate CSA:
- For shapes with curved surfaces (like the cylinder and cone), you can wrap a string or thread around the curved surface to measure it. Label this as CSA.
- Calculate and Display Calculations:
- Perform the calculations for TSA, CSA, and volume for each shape. Attach the results to the respective shapes using labels.
- Incorporate Scale:
- Include a scale on your model to demonstrate how real measurements translate to the model.
- Presentation Board (Optional):
- Create a presentation board with additional information about the 3D shapes and the formulas being demonstrated. Include diagrams and explanations.
- Set Up Your Exhibition Display:
- Arrange your model on a table with clear signage and any supporting materials you’ve prepared.
Your “3D Shapes: TSA, CSA, and Volume” working model is now ready for exhibition! This project effectively demonstrates how to calculate and understand the total surface area, curved surface area, and volume of various 3D shapes. It provides an interactive and engaging learning experience for viewers.