Concept:
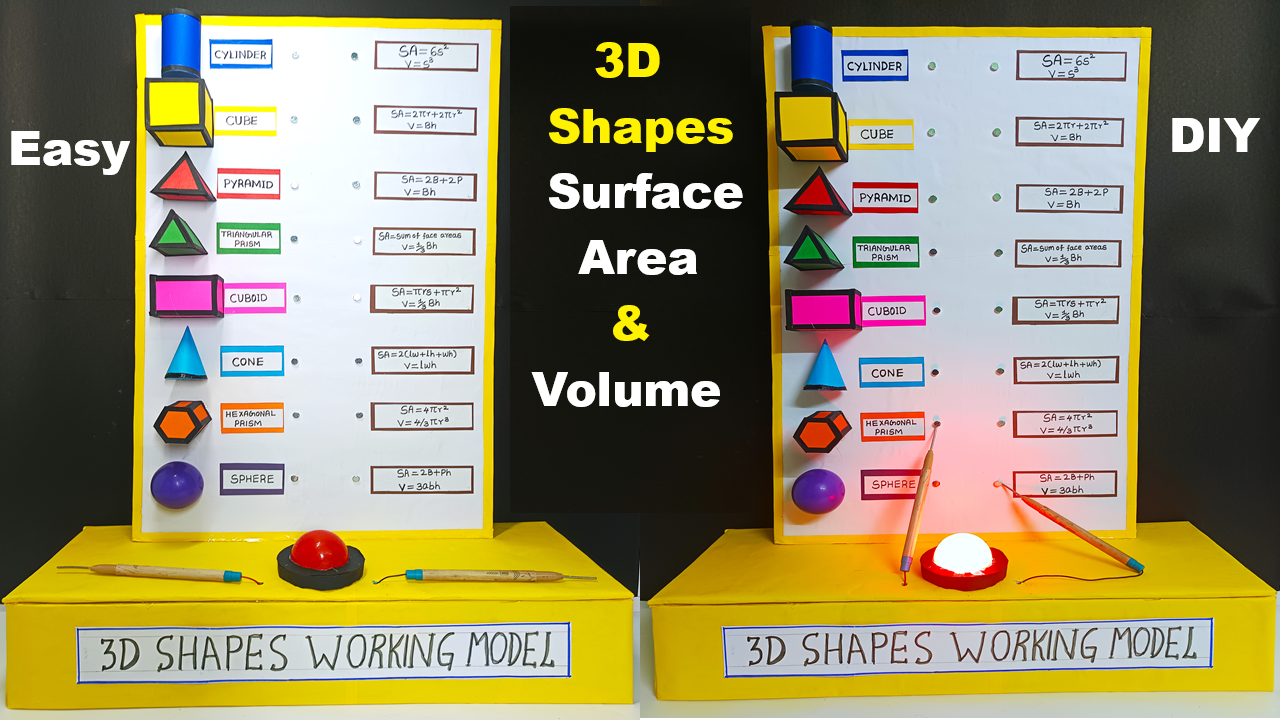
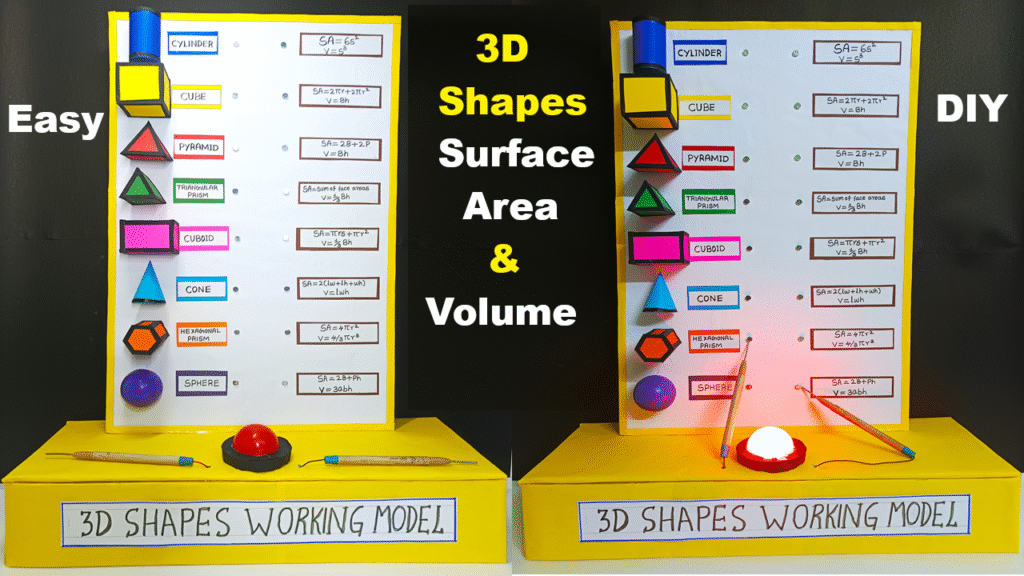
This interactive maths model helps students understand the surface area and volume of 3D geometric shapes like cube, cuboid, cylinder, cone, sphere, and pyramid.
The LED light glows when you press the correct formula button for a given shape, and the buzzer alerts when it’s incorrect — turning a simple model into a fun learning quiz system!
Materials Required:
For the Base & Shapes:
- Matchboard or plywood sheet (approx. 2×2 ft)
- Cardboard or thermocol (for making 3D shapes)
- Colored paper, sketch pens, glue, tape
- Labels for each shape
- Formula cards for surface area & volume
For Electrical Setup:
- 1 small LED lights
- 1 small buzzer
- Connecting wires (thin insulated wires)
- 9V battery or battery holder with on/off switch
- Push buttons / mini press switches / Metal Nails (one for each shape)
- Direct wiring under base
Tools:
- Hot glue gun
- Cutter or scissors
- Soldering iron (optional, for strong wire joints)
- Insulation tape
Step-by-Step Model Making:
Step 1 – Prepare the Matchboard Base
- Paint or cover your matchboard neatly with colored chart paper.
- Divide it into sections for each 3D shape — Cube, Cuboid, Cylinder, Cone, Sphere, and Pyramid.
- Write the title at the top:
“3D Shapes – Surface Area and Volume Interactive Model”
Step 2 – Make the 3D Shapes
Use cardboard, foam sheet, or thermocol to create solid shapes:
| Shape | Construction | Formula Card |
|---|---|---|
| Cube | 6 equal squares glued together | SA = 6a², V = a³ |
| Cuboid | Box of unequal sides (l,b,h) | SA = 2(lb + bh + hl), V = lbh |
| Cylinder | Rolled paper tube + 2 circles | SA = 2πr(h + r), V = πr²h |
| Cone | Rolled sector + base circle | SA = πr(l + r), V = ⅓πr²h |
| Sphere | Small ball | SA = 4πr², V = 4/3πr³ |
| Pyramid | Square base + 4 triangles | SA = Base + ½(Perimeter × Slant Height), V = ⅓×Base×Height |
Glue each shape firmly on its labeled section of the board.
Step 3 – Wiring the Circuit
Basic Working:
Each shape will have a Metal nail connected in a simple parallel quiz circuit.
Circuit Layout:
- Connect the positive terminal of the battery to one end of all push buttons.
- Connect the other end of each push button to its respective LED (+).
- Connect all LED negative (–) terminals to the battery’s negative terminal.
- For the buzzer, connect it to one button marked as “wrong answer.”
Tip: Hide the wires neatly under the board using tape or small channels made from chart paper.
Step 4 – Label and Integrate Quiz System
- Next to each shape, place two metal nails —
When you press the correct match, the LED glows (shows correct). - When you press the wrong match, the buzzer sounds (shows incorrect).
This makes your model both educational and interactive!
Step 5 – Add Finishing Touches
- Decorate with colored tape, arrows, and LED outlines.
- Place formula cards beside each shape (or under transparent plastic).
- Add labels for “Press to Check Formula” or “Correct / Wrong Answer.”
- Ensure all LEDs and the buzzer work properly when tested.
How It Works (Explanation for Presentation):
This 3D model shows how to calculate the surface area and volume of solid figures like cube, cuboid, cone, etc.
When we press the correct button, the LED glows — indicating the correct formula.
If we press the wrong button, the buzzer alerts us.
This helps students learn geometry formulas in a fun, interactive way.”