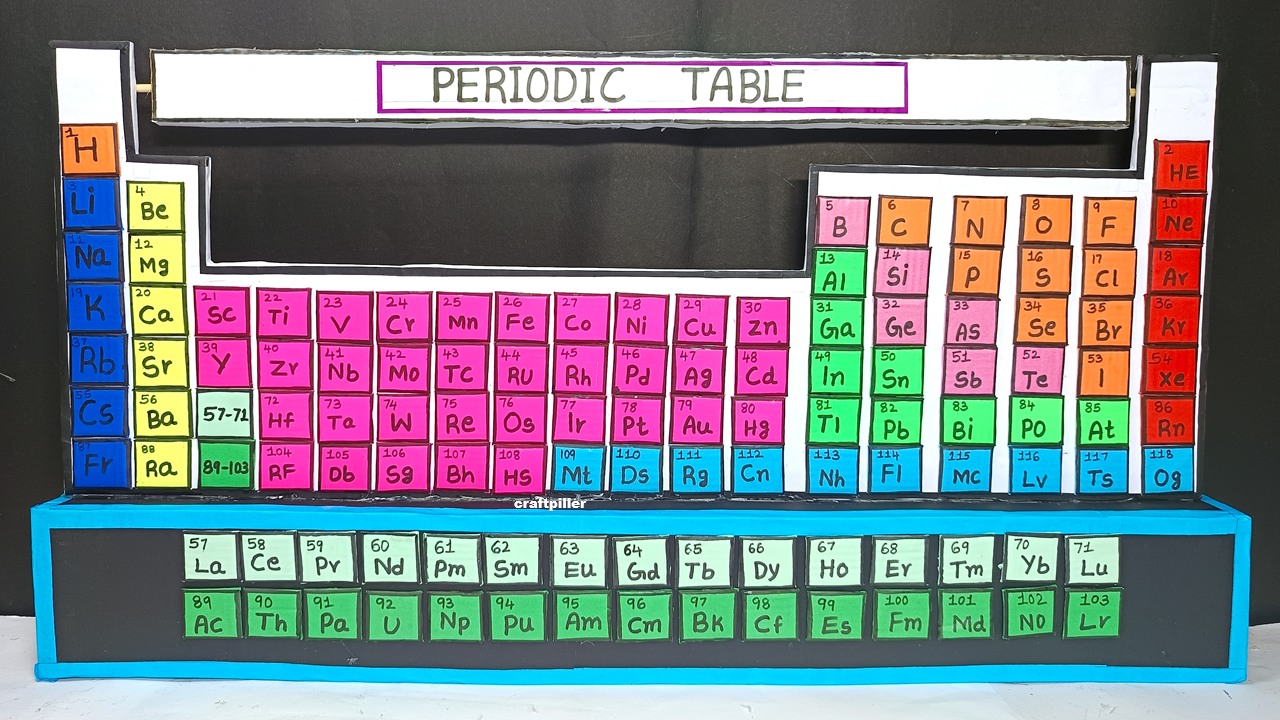
“This is a 3D model of the Periodic Table, made using cardboard and colored paper. Each tile represents one element, showing its atomic number, symbol, and category.

The color coding helps you quickly identify metals, non-metals, gases, metalloids, and more. The 3D elevation makes it easier to see the element blocks and groups.
How to Build the 3D Periodic Table (Step-by-Step):
Step 1: Prepare the Base Board
- Use a large piece of cardboard (at least A2 or A1 size) as your base.
- Mark rows (periods) and columns (groups) based on the periodic table layout.
Step 2: Make Element Tiles
Cover each tile with colored paper depending on the element type.
Cut small rectangles or cubes from cardboard (around 3×3 cm or 4×4 cm).
Step 3: Label Each Tile
- On each tile, write:
- Atomic number
- Symbol
- Element name (optional, if space allows)
- Use a bold marker for clarity.
Step 4: Stick the Tiles in 3D Layout
- Stick each tile in the correct position on the baseboard.
- For 3D effect:
- Use foam tape or extra cardboard behind each tile to raise it.
- You can make different blocks slightly raised depending on the group/category.
- Keep Lanthanides and Actinides in a separate raised row below the main table.
Step 5: Add Title and Legend
- On top, write: “Periodic Table of Elements – 3D Model”.
- Add a color legend key explaining what each color represents (metals, gases, etc.).
- Optionally, place group names on top of columns and period numbers on side.