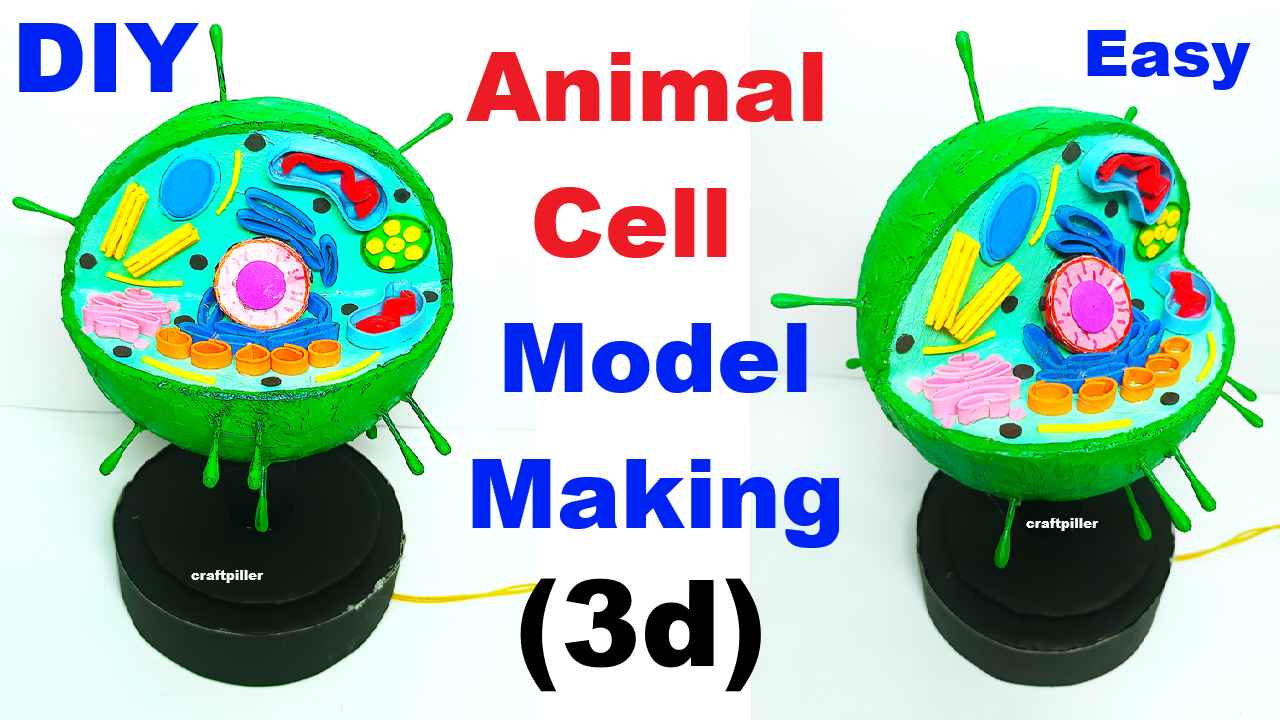
This is a 3D model of an animal cell using a quarter-cut plastic ball to show the inside. Each organelle is placed in its correct position.

The nucleus controls the cell, mitochondria generate energy, the ER transports materials, and the Golgi body packages them. The cytoplasm fills the space, and the cell membrane controls what enters or exits the cell.
How to Make the Model (Step-by-Step):
Step 1: Prepare the Plastic Ball
- Take a large plastic ball (like a beach ball or plastic ornament ball).
- Cut it into a quarter piece using a cutter or hot knife (adult supervision needed).
- This quarter shape will act like a cross-section showing the inside of the cell.
- Smooth the edges with sandpaper or tape them for safety.
Step 2: Mount the Ball on a Stand
- Fix the quarter ball vertically on a stand using glue or screws (attach a cardboard or thermocol base inside for stronger support).
- You can also use a hot glue gun or wrap the base with wire or rubber bands to hold it.
Step 3: Add Organelles Inside the Ball
Use different materials to show each organelle in 3D:
| Organelle | Material & Shape Suggestion |
|---|---|
| Nucleus | Small thermocol ball (painted purple), placed center |
| Nucleolus | Small clay ball inside nucleus |
| Mitochondria | Oval shapes made from clay, painted orange with folds |
| Golgi body | Folded ribbon shapes or layered cardboard pieces |
| Endoplasmic Reticulum (Rough/Smooth) | Clay tubes; add black dots for ribosomes |
| Ribosomes | Small beads or paper dots glued on ER |
| Cytoplasm | Inner wall of ball painted light pink or gel added |
| Cell membrane | Paint the inside edge of the ball or use colored tape |
| Lysosomes | Small colorful beads or balls |
| Centrioles | Toothpick bundles tied and painted |
| Vacuoles | Small pouches made of soft plastic or balloons |
Step 4: Label the Organelles
- Use toothpicks with paper flags to label each part.
- Write the name of each organelle clearly and insert flags into nearby foam/clay.
- Optionally, place a chart next to the model with functions of each organelle.