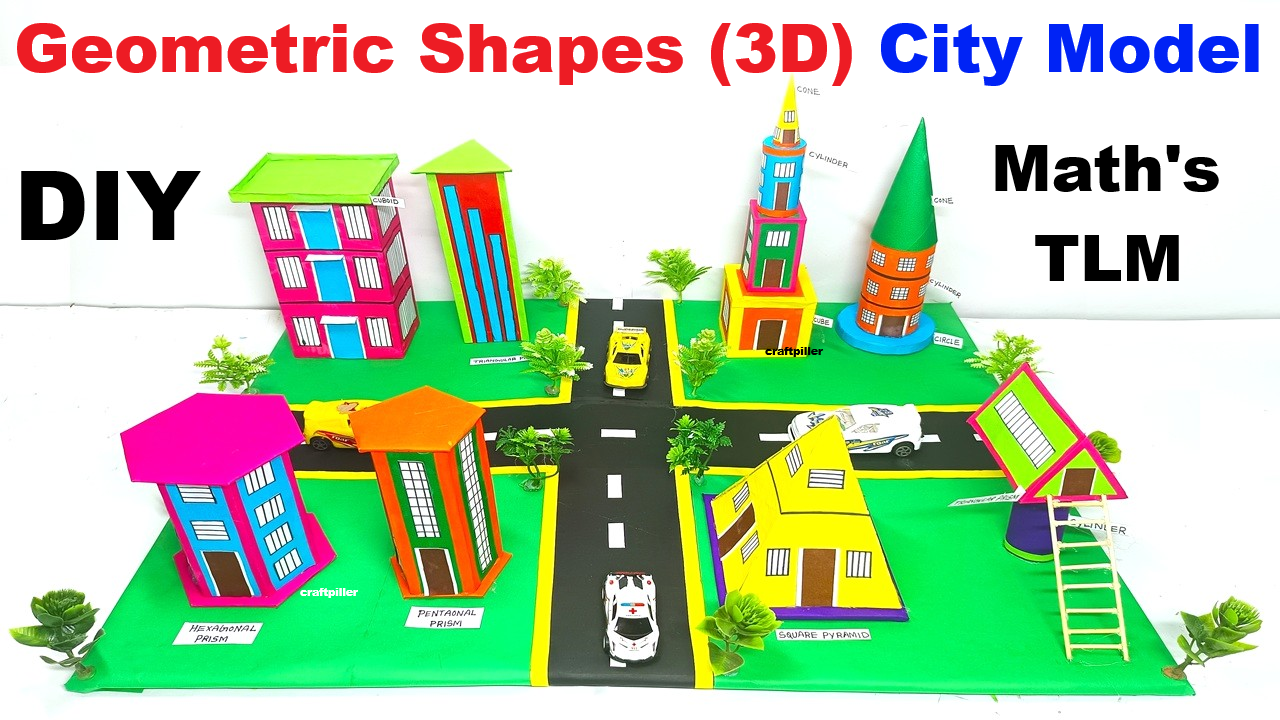
This project demonstrates how 3D geometric shapes are used in real-life buildings and structures. Every building in this model is based on a different 3D shape like cubes, cuboids, cylinders, cones, spheres, pyramids, and prisms.
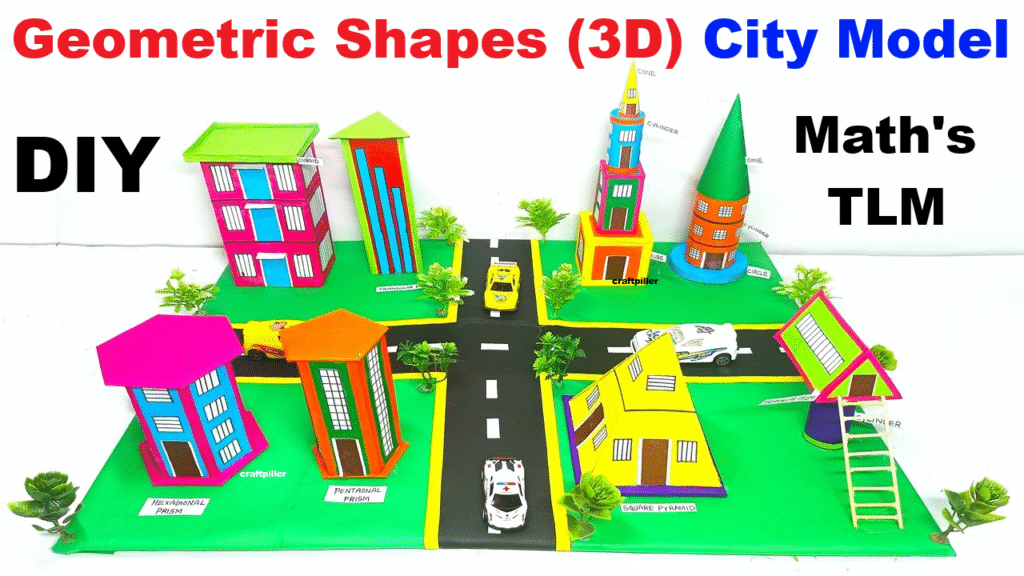
This helps students understand geometry through real-world applications like homes, towers, domes, lighthouses, etc.
How to Build the 3d Shapes City Model (Step-by-Step):
Step 1: Create the City Base
- Take a large rectangular cardboard base (say 60cm x 60cm).
- Paste black chart paper roads in a cross or grid layout.
- Add white dashed lines for lanes using paint or paper strips.
Step 2: Build the Geometric Buildings
- For each building:
- Draw nets of 3D shapes (cube, cuboid, cylinder, etc.) on color paper.
- Cut and fold them neatly, then glue to form 3D shapes.
- Or reuse small boxes, toilet paper rolls, etc., and wrap them in colored paper.
- Place them on your city base:
- Corner: Cone roof tower
- Middle: Cuboid school
- Side: Cylindrical water tank
- Front: Pyramid museum
- Park: Spherical fountain
Step 3: Add Roads, Trees, and Details
- Draw crosswalks, traffic signals, and arrows on roads.
- Add toy trees, benches, clouds (cotton) for decoration.
- Create lamp posts using straws, small signs using toothpicks.
- Optional: Create moving vehicles from bottle caps or matchboxes.
Step 4: Label the Shapes
- Use small flags or name boards to label each structure:
- “Cube – Apartment”
- “Cylinder – Water Tank”
- “Pyramid – Museum”, etc.