
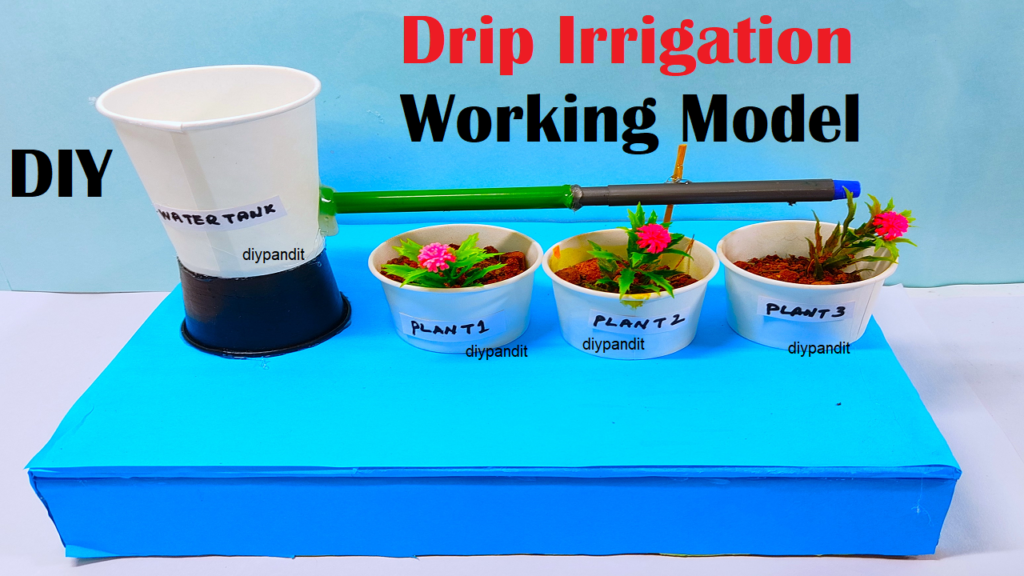
Creating a drip irrigation working model using paper cups for holding plants, sketch pens for the delivery pipe, a paper cup as the water tank, and a cardboard stand is a fantastic way to demonstrate the principles of drip irrigation.
Here’s a step-by-step guide on how to build this model:
Materials You’ll Need:
- Paper cups (for holding plants and as the water tank)
- Sketch pens or straws (for delivery pipes)
- Cardboard sheets (for the stand)
- Craft knife or scissors
- Hot glue gun and glue sticks
- Craft supplies for decoration (markers, stickers, etc.)
- Small container (for water reservoir)
- Small piece of cloth or sponge (for wick)
Step by Step Video on Drip irrigation working model for science exhibition
- Prepare the Cardboard Stand:
- Cut a piece of cardboard to create the stand for your model.
- Fold and assemble the cardboard to create a sturdy structure to hold the plants and water tank.
- Water Tank:
- Attach a paper cup to the top of the cardboard stand to represent the water tank.
- This cup will hold the water that will be distributed to the plants.
- Delivery Pipes:
- Cut sketch pens or straws into smaller sections to serve as the delivery pipes.
- Attach these pipes to the water tank (paper cup) to simulate water flow to the plants.
- Drip Emitters:
- At the end of each delivery pipe, create small holes or slits using a craft knife or needle. These will act as drip emitters.
- Plant Holders:
- Attach paper cups to the stand at various levels to hold the plants.
- Cut a small hole at the bottom of each cup to allow water to drip onto the plant’s soil.
- Water Wick:
- Attach a small piece of cloth or sponge inside the water tank (paper cup) to act as a wick.
- The wick will draw water from the tank and supply it to the delivery pipes.
- Water Reservoir:
- Place a small container at the bottom of the stand to act as a water reservoir.
- This container will catch any excess water that drips from the plants.
- Fill the Water Tank:
- Fill the water tank (paper cup) with water. The wick will draw water to the delivery pipes, which will then release water to the plants.
- Observe Drip Irrigation:
- Observe how water drips from the delivery pipes onto the plants’ soil, simulating drip irrigation.
- Final Touches:
- Decorate the model with craft supplies to make it visually appealing and realistic.
This model will help you understand the concept of drip irrigation and how it conserves water by delivering small amounts of water directly to the plants’ roots. It’s an engaging and educational way to learn about efficient irrigation methods for agricultural practices.
#dripirrigation #dripirrigationsystem #workingmodel #scienceexhibition #scienceproject #sciencefair #workingproject